
Have you ever reached into your pantry for a bag of rice, only to find an even older, half-used bag hidden in the back? It’s a common problem. We buy new groceries, place them in the front, and the older items get pushed further into the darkness, often until they’re stale or expired. This cycle leads to food waste and messes up our meal planning. The solution is a simple but brilliant concept used by supermarkets for decades: “First-In, First-Out,” or FIFO. And the easiest way to bring this efficiency into your home is with gravity-fed containers.
For years, I’ve helped families transform their chaotic pantries into models of efficiency, and the most effective tool is often the simplest. It’s not about expensive gadgets; it’s about smart systems. As someone who has been exploring and writing about kitchen storage solutions for years, I’ve seen firsthand how a well-designed gravity-fed system can eliminate waste and bring a sense of order. Author Edom Clark has spent his career diving into kitchen organization, focusing on practical solutions that blend research with real-world application. My passion isn’t just about tidy shelves; it’s about creating systems that make life easier and more sustainable for everyone, from busy parents to careful budgeters.
What Are Gravity-Fed Containers and Why Do You Need Them?
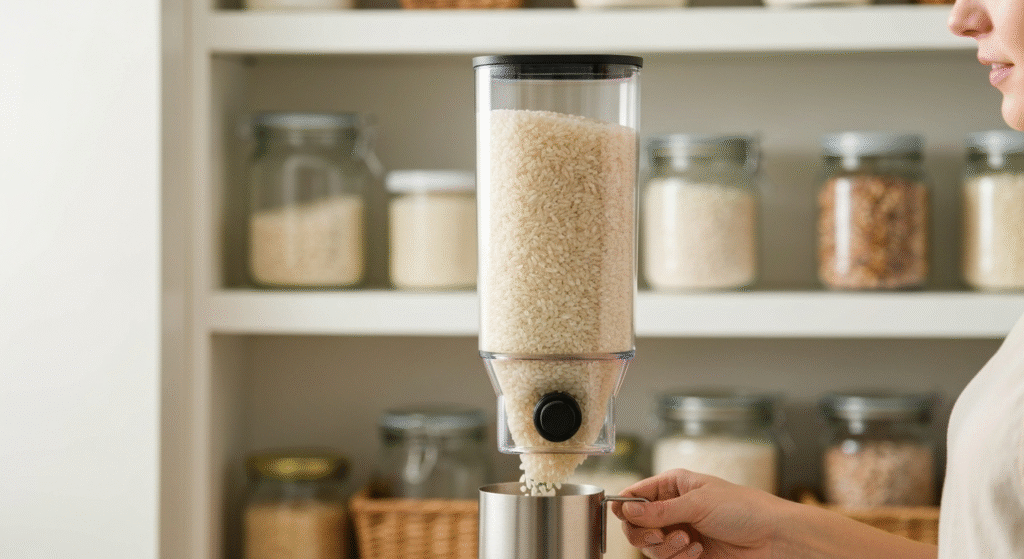
Gravity-fed containers are storage dispensers designed to enforce the First-In, First-Out (FIFO) principle automatically. The concept is wonderfully simple: you add new food to the top, and gravity ensures that the oldest food, which is already at the bottom, is dispensed first. Think of it like a candy dispenser or a water cooler. You fill from the top, and you take from the bottom.
This simple mechanism solves the biggest problem with traditional pantry storage. When you use a regular jar or bag, you almost always use the newest food you just added on top. The older food gets compacted at the bottom, growing staler with each passing day. A gravity-fed system makes it impossible to do this. The oldest ingredients are always front and center, ready to be used.
The core idea is to create a constant, effortless rotation of your stock. It takes the guesswork and the chore of manually rotating containers out of the equation. It’s a low-maintenance, set-it-and-forget-it solution for keeping your dry goods as fresh as possible.
The Core Benefits of a Gravity-Fed System
Adopting a gravity-fed storage system does more than just organize your pantry. It fundamentally changes how you manage your food supplies, leading to tangible benefits in your kitchen and your budget.
- Drastically Reduces Food Waste: This is the most significant advantage. By ensuring you always use the oldest stock first, you prevent food from expiring or going stale. No more discovering a forgotten bag of beans from two years ago. This directly translates to money saved.
- Guarantees Maximum Freshness: Foods like coffee beans, nuts, and whole grains lose their flavor and nutritional value over time. A FIFO system guarantees that what you’re cooking with is always the freshest possible from your stock.
- Saves Time and Effort: Forget digging through shelves to find what you need or manually moving containers around to rotate them. Gravity does the work for you. A quick glance tells you what’s running low, simplifying your grocery list.
- Creates an Organized, Tidy Space: These systems create a uniform and accessible pantry. Everything has its place, it’s easy to see, and it’s easy to dispense. This visual organization can reduce stress and make cooking more enjoyable.
Here’s a quick comparison of traditional storage versus a gravity-fed system:
| Feature | Traditional Storage (Jars, Bags) | Gravity-Fed System |
| Stock Rotation | Manual and often forgotten | Automatic (First-In, First-Out) |
| Freshness | Oldest items often get stale | Oldest items are always used first |
| Food Waste | Higher risk of expired/stale food | Significantly reduced waste |
| Organization | Can become cluttered and chaotic | Neat, uniform, and easy to monitor |
| Convenience | Requires digging and searching | Easy, one-handed dispensing |
Types of Gravity-Fed Containers: DIY vs. Store-Bought
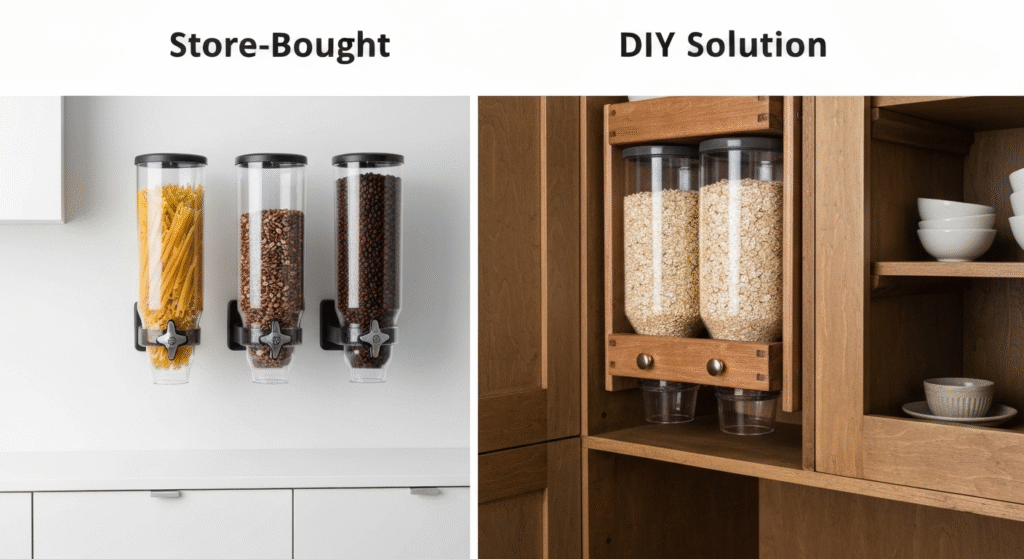
When you decide to implement a gravity-fed system, you have two main paths: buying a ready-made commercial solution or building one yourself. Both have their merits, and the right choice depends on your budget, space, and desire for a custom fit.
Commercial Gravity-Fed Dispensers
Store-bought options are convenient and come in various styles, from single countertop units to large, wall-mounted banks of dispensers. These are often made from food-safe plastic and are designed for easy cleaning and use. They are perfect for anyone who wants a quick and reliable solution without the hassle of a building project.
Pros:
- Ready to Use: No assembly or construction is required.
- Food-Safe Materials: Professionally manufactured to be safe for food contact.
- Aesthetic Appeal: Often have a sleek, uniform look that enhances pantry organization.
- Proven Design: Engineered to prevent common issues like food getting stuck.
Cons:
- Higher Cost: Can be significantly more expensive than DIY solutions, especially for multiple units.
- Fixed Sizes: You are limited to the dimensions and capacities offered by the manufacturer.
- Less Customizable: May not fit perfectly into unique or awkward pantry spaces.
A client of mine, a baker who buys specialty flours in bulk, initially struggled with store-bought bins. The fine texture of the flour would sometimes compact and fail to flow properly in dispensers designed for larger items like beans or cereal. This highlights the importance of matching the dispenser type to the specific food you plan to store.
Building Your Own: Simple DIY Gravity-Fed Solutions
For those with a bit of DIY spirit, building your own gravity-fed containers is an incredibly rewarding project. It allows you to create a system perfectly tailored to your space and needs, often for a fraction of the cost of commercial units. You can use a variety of materials, including wood, food-grade PVC pipes, or even modified food-grade buckets.
The basic principle of any DIY build is the same:
- A top opening for loading new food.
- A storage chamber that directs the food downward.
- An angled bottom or internal ramp (usually around 45 degrees) to guide the oldest food toward the front.
- A dispensing opening at the bottom front.
A Mini Case Study in DIY Success:
I recently worked with a family who buys 25-pound sacks of rice and lentils to save money. Their problem was that the bottom half of the sack would sit for months, and they could taste the difference in freshness. We designed a simple dispenser using a single sheet of plywood. It was essentially a tall, narrow wooden box with a plexiglass front to see the level. Inside, we installed a slanted shelf that funneled the rice to a small sliding gate at the bottom. They now load a new 25-pound sack into the top, and the dispenser holds it all, feeding them the oldest rice first every time. The project took one afternoon and completely solved their food waste problem.
Common Materials for DIY Builds:
- Plywood or Solid Wood: Durable, customizable, and can be sealed to be food-safe.
- Food-Grade Buckets: A very simple method involves two buckets. Cut a hole in the side of the bottom of one bucket, and a corresponding hole in the lid of another. Stack them, and you have a basic system.
- PVC Pipes: Large-diameter PVC pipes can be mounted on a wall and fitted with a cap on top and a spout on the bottom for a slim, space-saving solution.
Best Foods for Gravity-Fed Storage (And What to Avoid)
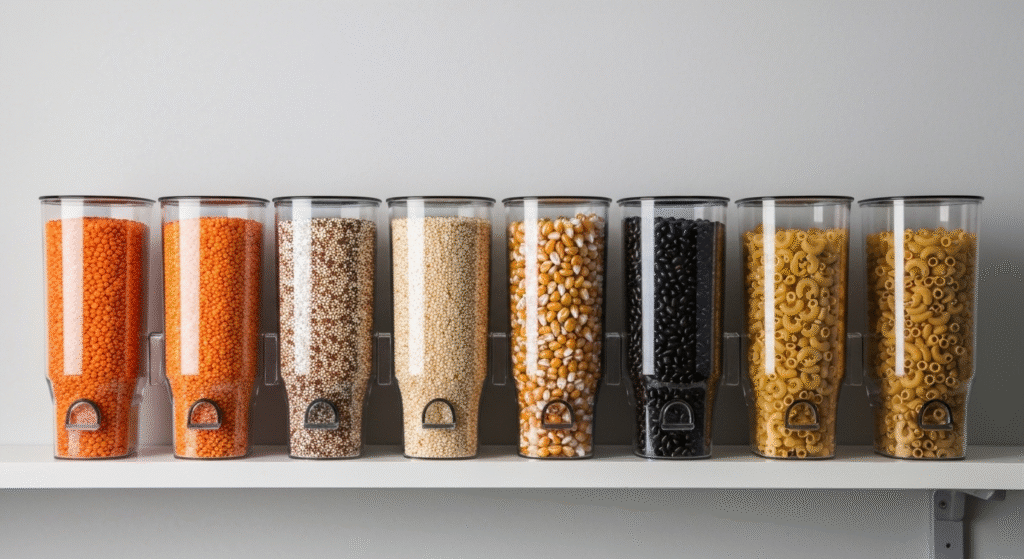
While gravity-fed systems are versatile, they don’t work for everything. The ideal candidates are dry, hard, and uniform in shape, allowing them to flow freely without clogging, clumping, or breaking.
| Ideal Foods | Foods to Approach with Caution | Foods to Avoid |
| Rice (all varieties) | Oats (can sometimes bridge) | Brown Sugar (clumps easily) |
| Dried Beans & Lentils | Certain Cereals (fragile flakes can break) | Flour & Powders (can compact) |
| Popcorn Kernels | Small, flat pasta shapes | Sticky Dried Fruit (e.g., raisins, dates) |
| Coffee Beans | Granola with sticky bits | Gummy Candies or Marshmallows |
| Quinoa & Other Hard Grains | Powdered Drink Mixes | Potato Chips or Pretzels (too fragile) |
| Small, Hard Pasta (e.g., macaroni) | Nuts (oils can leave residue over time) | Anything oily, sticky, or fragile |
The key is flow. If an item can be poured easily from a bag without sticking to itself, it’s likely a good candidate for a gravity-fed dispenser.
Setting Up Your Gravity-Fed Pantry: Step-by-Step Guide
Ready to make the change? Here’s a simple process to follow for a smooth transition to a FIFO pantry.
Step 1: Assess Your Space and Needs
Before you buy or build anything, measure your shelves. Note the height, width, and depth you have available. Think about what you buy in bulk most often. How many dispensers do you need? Will they sit on a shelf, hang on a wall, or be built into a cabinet? Planning this out first prevents headaches later.
Step 2: Choose Your Containers or Materials
Based on your assessment, decide whether to buy commercial dispensers or build your own. If buying, order one or two first to ensure they fit your space and work with your chosen foods. If building, gather your materials. Remember to use food-safe materials and finishes for any surface that will touch the food.
Step 3: Installation and First Fill
Set up your dispensers in their designated spot. Before filling them for the first time, give them a good wash and let them dry completely. When you fill a dispenser, use up any existing, older open bags of that food first. Then, pour the new food on top. This “primes” your system so you’re starting with the oldest stock at the bottom from day one.
Step 4: Labeling for Clarity
This is a crucial step. Use clear, easy-to-read labels for each container. You can also add a small label with the purchase date of the newest batch added. This is helpful for tracking the general age of your stock, even though the system rotates it for you.
Common Problems and Troubleshooting
Even the best systems can have minor issues. Here’s how to handle the most common ones.
- Problem: The food is stuck (bridging).
- Cause: This happens when pieces of food wedge against each other, forming an arch over the dispenser opening and blocking the flow. It’s common with less-uniform items like granola or oats.
- Solution: Gently tap the side of the container to dislodge the arch. For DIY builds, ensure your ramp angle is steep enough (at least 45 degrees) and the opening is wide enough for the food you’re storing.
- Problem: The dispenser is difficult to clean.
- Cause: Some designs have nooks and crannies that are hard to reach. Oily foods like nuts or coffee beans can leave a residue that builds up.
- Solution: Opt for dispensers with wide openings and removable parts. For cleaning, use a long-handled bottle brush with warm, soapy water. Ensure the container is bone-dry before refilling to prevent mold and clumping. Rotate different types of food through the same dispenser only after a thorough cleaning.
Frequently Asked Questions (FAQs)
How do you clean a gravity-fed container properly?
Empty the container completely. Wash it with warm, soapy water using a bottle brush to reach all corners. For stubborn oils from nuts or coffee, a solution of water and vinegar can help. Rinse thoroughly and let it air dry completely before refilling.
Can I use gravity feeders for pet food?
Absolutely! Gravity-fed systems are perfect for dispensing dry pet food. It ensures your pet is always getting the oldest kibble first, keeping their food supply fresh. Just be sure to get a size appropriate for the amount of food they consume.
What is the best angle for a DIY gravity feeder?
A 45-degree angle is generally considered the sweet spot for most dry goods like rice and beans. For items that are lighter or less uniform, you may need a steeper angle, closer to 60 degrees, to ensure consistent flow.
Will gravity-fed containers keep pests out?
Most well-designed commercial and DIY containers are sealed systems that are excellent at keeping out pantry pests like moths and weevils. Ensure your loading lid and dispensing spout close securely.
Conclusion: Embrace the Flow
Switching to gravity-fed containers is more than just an organizational hack; it’s a commitment to reducing waste, ensuring freshness, and bringing smart, simple efficiency into your home. It removes the mental load of stock rotation and transforms your pantry from a zone of potential waste into a reliable, rotating supply of your most-used ingredients. Whether you choose a sleek store-bought unit or a custom-built DIY project, embracing the simple power of gravity is one of the most effective steps you can take toward a smarter, more sustainable kitchen.

Hi, I’m Edom Clark, the creator and writer behind Taanzo. For the past five years, I’ve been exploring and writing about kitchen storage and home organization. My experience comes from both personal experimentation and hands-on observation — testing different storage systems, materials, and layouts to find what truly works in everyday homes. Over time, I’ve come to appreciate how small adjustments in storage can transform the way we cook, clean, and even enjoy time in the kitchen. Through Taanzo, I aim to share that knowledge in a way that’s honest, approachable, and genuinely useful.

