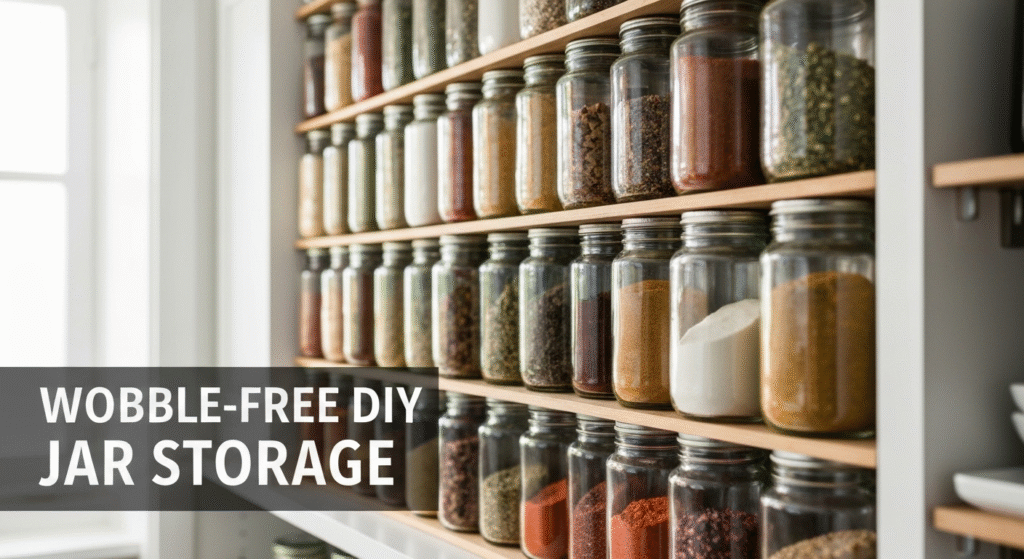
Upcycling glass jars into a modular storage grid is one of the most satisfying ways to bring order to a chaotic space. If you’ve ever stared at a jumble of mismatched containers in your pantry or craft room, you know the frustration. A well-designed modular grid transforms that clutter into a clean, functional, and beautiful system. This isn’t just about gluing jars to a board; it’s about creating a stable, stackable structure that you can customize perfectly for your needs.
My journey into kitchen organization started years ago, not in a design studio, but in my own small kitchen, trying to make sense of limited cabinet space. As Edom Clark, I’ve spent the better part of five years exploring and sharing practical storage solutions that don’t require a huge budget. My passion lies in finding the clever details that turn a simple DIY project into something truly durable and useful. I believe that a well-organized space can bring a sense of calm and efficiency to your daily life, and I’m excited to share what I’ve learned about building these systems from the ground up.
Why Choose a Modular Jar Grid?
Before we dive into the nuts and bolts, let’s break down why this project is such a game-changer. It’s more than just a passing trend; it’s a practical solution with lasting benefits. The core idea is to create a custom-fit organizer using items you might otherwise throw away.
The Key Advantages:
- Sustainability at its Best: You’re giving glass jars a second life, reducing waste and the need to buy new plastic containers. It’s a small step that makes a big environmental impact.
- Complete Customization: Unlike off-the-shelf organizers, a DIY grid is built to your exact specifications. You decide the size, shape, and layout to fit your specific drawer, shelf, or countertop perfectly.
- Excellent Visibility: Glass jars let you see exactly what you have at a glance. This means less time hunting for that one specific spice and a lower chance of buying duplicates you don’t need.
- Incredible Versatility: While perfect for spices in the kitchen, this system works wonders in other parts of the home. Think of a craft room with beads and buttons, a garage with nuts and bolts, or a home office with paper clips and pushpins.
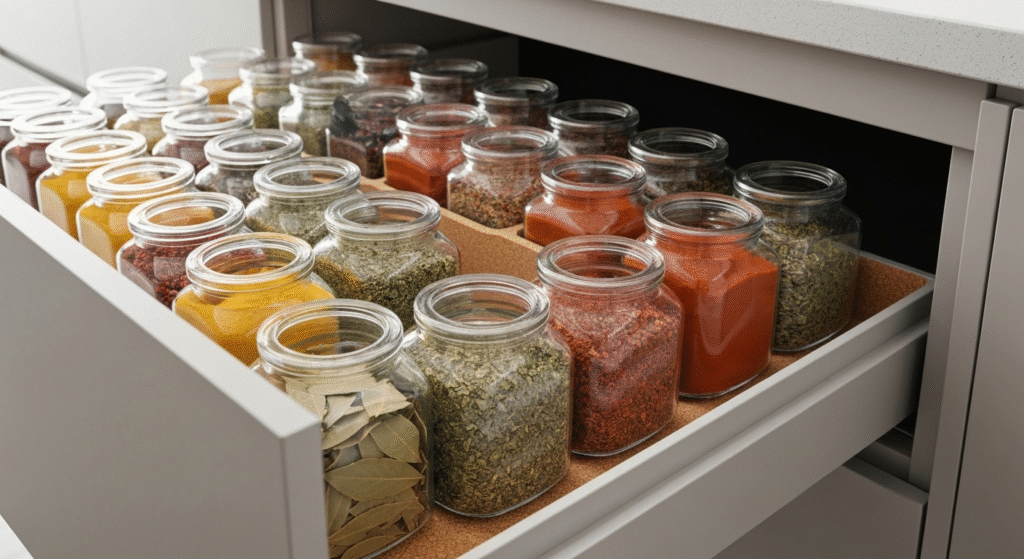
A client I worked with last year was struggling with a deep, awkward pantry drawer. Everything got lost in the back. We built a custom-fit modular jar grid for her most-used spices and dried herbs. The transformation was immediate. She could pull the drawer open and instantly see everything, turning a frustrating daily task into a simple, organized one.
Gathering Your Materials: A Thoughtful Approach
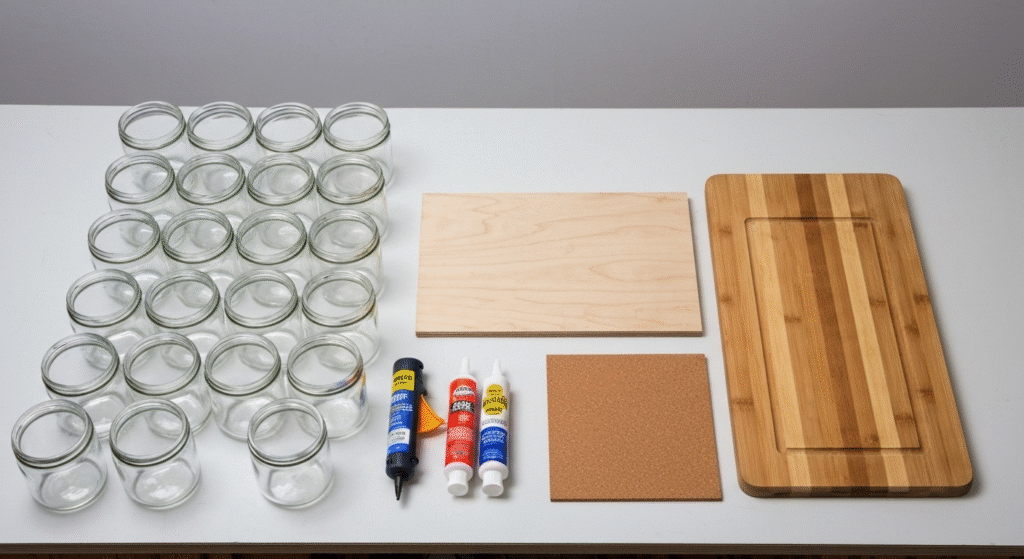
Success starts with choosing the right components. While the concept is simple, the quality of your materials will determine the sturdiness and longevity of your storage grid.
Choosing the Perfect Jars
Not all jars are created equal for this project. Consistency is your best friend here. While you can mix and match, using jars of the same diameter for your base layer will make the entire process much easier and the final result far more stable.
| Jar Characteristic | Why It Matters | Best For |
| Shape | Square jars fit together with no wasted space, creating a seamless look. Round jars are more common but create small gaps. | Square jars for maximum efficiency. Round jars are great for a classic honeycomb pattern. |
| Size | Using jars of the same height and diameter creates a uniform, stable base for stacking. | Consistent sizes for the base layer. You can stack smaller jars on top. |
| Lid Type | Lids should be flat and provide a good grip. Avoid rounded or highly decorative lids, as they make stacking unstable. | Simple, flat metal or plastic lids. |
| Glass Quality | Thicker, sturdier glass (like from sauces or pickles) is more durable than thinner glass (like from some jellies). | Repurposed food jars are typically very durable. |
Before you begin, gather more jars than you think you’ll need. This gives you the flexibility to choose the best ones and have spares in case of mistakes.
Selecting the Right Base
The base is the foundation of your entire grid. It needs to be rigid, flat, and strong enough to support the weight of the filled jars.
- Plywood or MDF: A thin sheet (around 1/4 inch or 6mm) is an excellent choice. It’s strong, perfectly flat, and easy to cut to the exact dimensions of your drawer or shelf.
- Cork Board: A fantastic option for creating a non-slip surface. The slight give of the cork can also help dampen vibrations and prevent jars from sliding. You can even create subtle indentations for the jars to sit in.
- Heavy-Duty Foam Board: Often used for presentations, this can work for lightweight items like spices or craft supplies. It’s easy to cut but may not be durable enough for heavier contents.
- Upcycled Trays or Cutting Boards: A sturdy old serving tray or a flat wooden cutting board can serve as a beautiful, ready-made base.
Adhesives and Fasteners
Your choice of adhesive will determine whether your grid is permanent or adjustable.
- Hot Glue: Fast and easy, but not the strongest bond. It’s best for lightweight items and situations where you might want to reconfigure the grid later (it can often be peeled off).
- Strong Construction Adhesive (e.g., E6000, Gorilla Glue): This creates a permanent, waterproof, and very strong bond. It’s the best choice for a heavy-duty grid that will hold significant weight. It requires a longer curing time.
- Silicone Caulk: Provides a strong but slightly flexible bond. It’s great for dampening vibrations and is completely waterproof, making it a solid choice for kitchens and bathrooms.
The Blueprint: Planning for a Wobble-Free Grid
This is the most crucial stage. A few minutes of careful planning will save you from the frustration of a wobbly, unstable final product. This is where we move beyond a simple craft and into creating a truly functional piece of engineering.
The Secret to Stability: Base Alignment and Grip
The number one failure point for these projects is instability. Jars that slide or wobble are not only annoying but also a potential hazard. Let’s tackle this head-on.
I learned this lesson the hard way. One of my first projects was a spice rack for a friend. I used beautiful, uniform jars but simply glued them flat onto a smooth wooden board. A week later, he called me. Every time he opened the drawer, the jars would shift and rattle. The smooth-on-smooth contact between the glass and the sealed wood was the problem.
Here’s how to avoid that mistake and guarantee a stable grid:
- The Honeycomb Layout: For round jars, arranging them in a honeycomb pattern is inherently more stable than a simple grid. Each jar is braced by its neighbors, minimizing movement.
- Create Grip Friction: The best way to prevent sliding is to introduce friction. Gluing a thin sheet of cork or a non-slip shelf liner onto your base before you attach the jars works wonders. The slightly yielding surface gives the base of the jars something to “bite” into.
- The Indentation Method: If you’re using a cork or foam board base, you can create a super stable system. Place your jars in their final layout and press down firmly to create slight indentations. You can then add a dot of glue inside each indentation for a perfectly seated, rock-solid fit.
Here’s a comparison of stability techniques:
| Technique | Pros | Cons | Best For |
| Gluing to a Smooth Base | Easiest method. | Prone to sliding and wobbling. | Only very lightweight items that are rarely moved. |
| Using a Non-Slip Liner | Excellent grip, reduces noise. | Adds an extra layer and step. | Kitchen drawers and high-traffic shelves. |
| The Honeycomb Layout | Naturally stable and visually appealing. | Can be tricky to get the spacing perfect. | Round jars, especially for spices or beads. |
| The Indentation Method | Extremely secure fit, prevents any movement. | Only works with softer base materials like cork. | The ultimate “wobble-proof” solution. |
Thinking Vertically: The Art of Stacking
If you want to build a multi-level grid, you need to consider the physics of stacking.
- Weight Distribution: Always place your heaviest jars on the bottom layer. The top layers should be for lighter items like dried herbs or small craft supplies.
- Lid-to-Base Contact: The stability of your stack depends on the contact point between the bottom of the top jar and the lid of the bottom jar. This is why flat lids are essential. For extra security, you can add small, clear silicone dots (the kind used on cabinet doors) to the lids to create a non-slip point of contact.
- Interlocking Layers: For maximum stability in a multi-level unit, consider making the second layer slightly smaller than the first, ensuring the jars on top are resting on multiple lids below, not just one.
Step-by-Step Construction Guide

With your materials gathered and your plan in place, it’s time to build.
- Prepare Your Jars: The first step is to get your jars sparkling clean. Remove all labels and adhesive residue. A soak in hot, soapy water usually does the trick. For stubborn glue, a little rubbing alcohol or cooking oil on a cloth works well. Ensure the jars and lids are completely dry before you begin.
- Prepare and Mark Your Base: Cut your base material to the desired size. Wipe it down to ensure it’s free of dust. Arrange your clean, empty jars on the base in your chosen layout. Use a pencil or marker to lightly trace around the bottom of each jar. This gives you a perfect guide for applying adhesive.
- Secure the First Layer: Remove the jars. Apply a small but sufficient amount of your chosen adhesive within each traced circle on the base. Don’t use too much, or it will squeeze out the sides and create a mess. Carefully place each jar onto its spot, pressing down gently but firmly.
- Allow to Cure: This is a test of patience! Let the adhesive cure completely according to the manufacturer’s instructions. For construction adhesives, this can be up to 24 hours. Resisting the urge to test it too early is key to a strong, lasting bond.
- Test for Stability: Once cured, gently try to wiggle each jar. They should feel completely solid. If any are loose, you may need to carefully remove them and re-apply adhesive.
- Fill and Stack: Fill your base-layer jars with their contents. Now you can begin stacking your second layer if you planned for one. Place them carefully, ensuring they are centered and stable before letting go.
Troubleshooting Common Issues
Even with the best planning, you might run into a snag. Here’s how to handle common problems.
- “My jars are still a bit wobbly.”
- The most likely cause is an uneven base or rounded jar bottoms. If the adhesive is already cured, your best bet is to use a non-slip mat underneath the entire unit to prevent it from sliding in the drawer or on the shelf.
- “The adhesive isn’t holding.”
- This usually happens if the surfaces weren’t perfectly clean and dry. It can also happen if you use an adhesive that isn’t suited for glass or your base material. You may need to scrape off the old glue and start again with a stronger adhesive like silicone or construction glue.
- “My grid doesn’t fit the space.”
- This is why the “measure twice, glue once” rule is so important. Unfortunately, if the base is already cut and the jars are glued, the options are limited. It’s better to spend extra time in the planning phase to ensure your measurements are exact.
Frequently Asked Questions (FAQs)
What’s the best type of jar to use for a modular grid?
The ideal jars are all the same size and shape, especially for the base layer, as this creates the most stable foundation. Square jars are the most space-efficient, but uniform round jars (like baby food or pimento jars) work wonderfully in a honeycomb pattern.
Can I make a stackable grid without using permanent glue?
Yes, you can. A great non-permanent method is to build a frame around the jars out of thin wood strips, creating compartments for each jar. You can also use a deep tray and a grippy shelf liner, which will hold the jars in place through friction alone, especially if they fit snugly.
How do I clean a modular jar grid?
For a glued grid, you cannot submerge it in water. The best way to clean it is to use a damp cloth to wipe down the lids and the base. A small brush or compressed air can be used to clear out dust from the gaps between jars.
What are the best items to store in these upcycled jars?
They are perfect for kitchen spices, dried herbs, seeds, and nuts. In a craft room, they’re ideal for beads, buttons, glitter, and small supplies. In the garage or workshop, they can organize screws, nails, washers, and other small hardware.
Conclusion: Build Your Own Order
Creating a modular storage grid from upcycled glass jars is more than just a clever DIY project; it’s a practical step toward a more organized and sustainable home. By focusing on the fundamentals of a solid base, smart layout, and anti-wobble techniques, you can build a custom solution that is not only beautiful but incredibly functional. You’re not just clearing clutter; you’re building a system that brings ease and efficiency to your daily routine, one jar at a time. Now, what will you organize first?

Hi, I’m Edom Clark, the creator and writer behind Taanzo. For the past five years, I’ve been exploring and writing about kitchen storage and home organization. My experience comes from both personal experimentation and hands-on observation — testing different storage systems, materials, and layouts to find what truly works in everyday homes. Over time, I’ve come to appreciate how small adjustments in storage can transform the way we cook, clean, and even enjoy time in the kitchen. Through Taanzo, I aim to share that knowledge in a way that’s honest, approachable, and genuinely useful.

