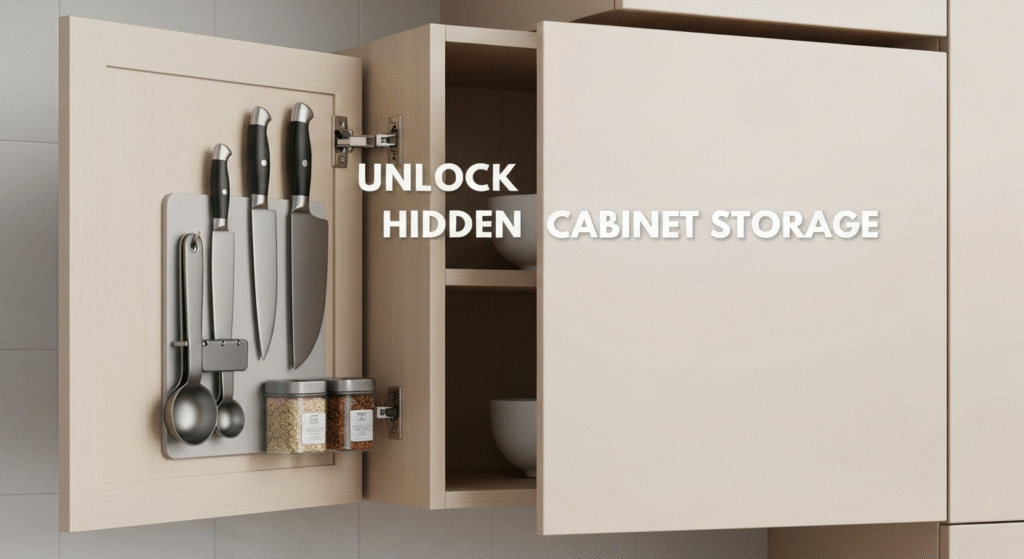
Hidden magnetic boards behind cabinet doors are one of the most satisfying and clever ways to reclaim wasted space in your home. We all struggle with cluttered drawers and countertops, especially with those small, essential items that never seem to have a proper home. Think about your measuring spoons, spice tins, keys, or even small DIY tools. They get lost in the shuffle. This simple project transforms the unused inner surface of a cabinet door into a highly efficient, invisible storage hub. But here’s the thing: getting it right involves more than just sticking a magnet to a door. There’s a crucial balance between magnetic strength, the weight of your items, and the structural integrity of your cabinet door.
Hello! I’m Edom Clark. For years, I’ve been obsessed with finding smarter ways to organize our living spaces, and my work has brought me deep into the world of kitchen storage. My passion isn’t just about making things look tidy; it’s about creating systems that genuinely make life easier. I spend my time researching materials, testing methods, and helping people solve those nagging storage puzzles. What I enjoy most is sharing what I’ve learned along the way, breaking down complex ideas into simple, practical steps so you can create a more organized and functional home.
This guide is the result of years of hands-on experience, including learning from mistakes. We’ll go beyond the basics to explore the nuanced details that make the difference between a wobbly, sagging door and a perfect, long-lasting storage solution. Let’s break down how to choose the right materials, master the installation, and avoid the common pitfalls I’ve seen time and time again.
Why This Hidden Storage Method is a Game-Changer
Before we get into the technical details, let’s talk about why this solution is so effective. In any kitchen, workshop, or bathroom, space is a premium commodity. We often focus on filling shelves and drawers, completely overlooking the valuable vertical real estate right in front of us: the back of our cabinet doors.
Here’s why this approach works so well:
- It Utilizes Dead Space: The inside of a cabinet door is typically empty. Installing a magnetic board there instantly adds a new layer of storage without taking up any shelf or counter space.
- Accessibility Meets Invisibility: It keeps frequently used items within easy reach. You open the door, and everything is right there, neatly organized. When you close it, the clutter completely disappears, maintaining a clean and minimalist look.
- It Protects Your Items: Unlike a jumbled drawer where knives can get dull or small tools can get damaged, magnetic storage keeps each item separate and secure.
- It’s Incredibly Versatile: This isn’t just for kitchen knives. It’s perfect for metal spice jars, office supplies in a desk cabinet, or grooming tools like tweezers and clippers in the bathroom.
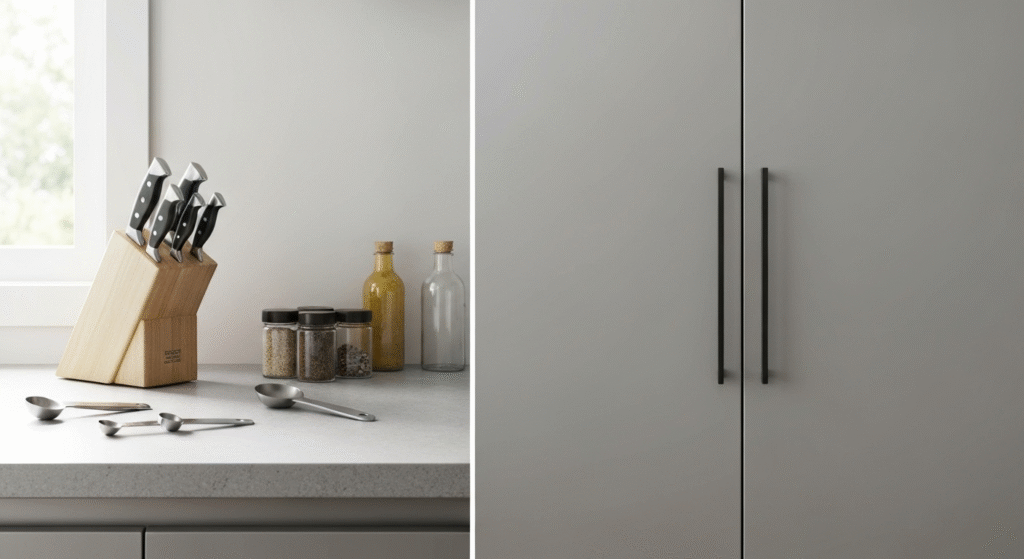
Compared to countertop knife blocks that eat up space or drawer inserts that can become disorganized, this hidden solution offers a unique blend of efficiency and aesthetics.
The Critical Balance: Magnetism vs. Door Weight
This is the single most important concept to understand. The project fails if the magnetic board is too heavy for the door or if the magnets aren’t strong enough to hold your items securely. It’s a delicate balancing act.
Let me share a quick story. I once advised a client who was excited to organize their collection of high-end chef’s knives. They bought a very thick, powerful steel magnetic bar and screwed it onto the inside of their pantry door, which was made of standard particleboard. A month later, I got a call. The door was sagging noticeably, and it wouldn’t close properly. The combined weight of the heavy bar and the knives was too much for the door’s material and its standard-issue hinges.
This experience taught me a vital lesson: you must assess the door first. Here’s what to consider:
Understanding Your Cabinet Doors
Not all cabinet doors are created equal. The material and construction will determine how much weight they can safely support.
- Solid Wood: These are the strongest and can handle the most weight. If you have solid oak, maple, or cherry doors, you have more flexibility.
- Plywood: Still very strong and stable. Plywood doors can typically handle a moderate amount of weight without issue.
- MDF (Medium-Density Fiberboard): MDF is dense but can be prone to stripping screw holes if overloaded. It can handle lightweight solutions well.
- Particleboard: This is the most common material in budget cabinetry and the weakest. It’s highly susceptible to weight-related stress and sagging. For particleboard doors, you must use the lightest possible solution.
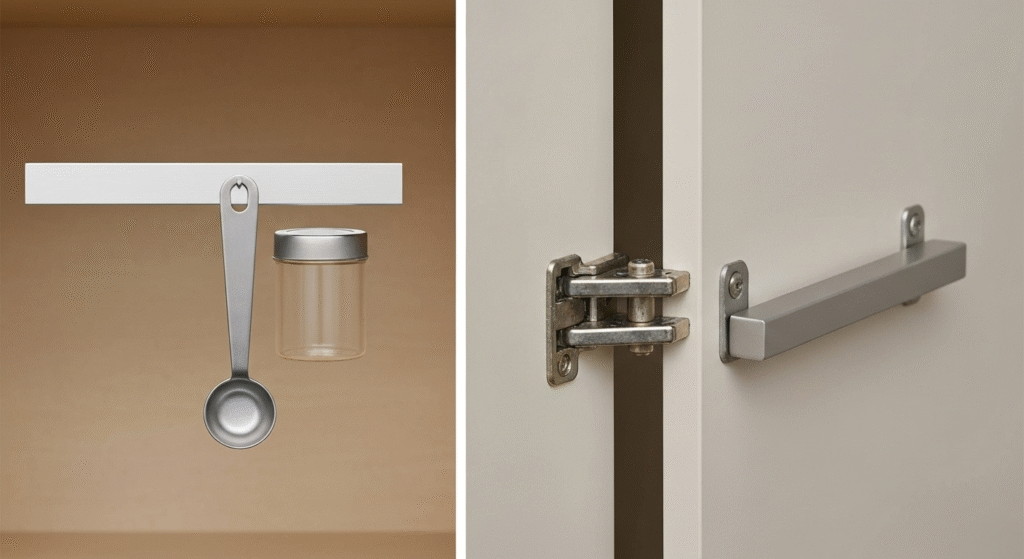
Action Step: Open your cabinet and look at the hinges. Are they heavy-duty and adjustable (like European-style hinges), or are they simple, small hinges? Stronger hinges can support more weight. Gently try to wiggle the door; if it feels loose or flimsy, you need to be extra cautious.
Choosing the Right Magnetic Strength
The magnet itself is the other half of the equation. You need a pull force that is strong enough to hold your items without fail, but not so aggressive that it’s difficult to remove them.
| Magnet Type | Magnetic Strength | Cost | Durability | Best For |
| Neodymium | Very High | Higher | Brittle, often coated to prevent chipping | Heavy items like knives, wrenches, or securing items through a thin layer of wood. |
| Ferrite (Ceramic) | Moderate | Lower | Less brittle, more resistant to corrosion | Lighter items like spice tins, paper clips, keys, measuring spoons. |
For most behind-the-door projects, ferrite magnets or thinner neodymium options are ideal. A super-strong neodymium magnet can cause a steel knife to snap aggressively onto the surface, potentially damaging the blade over time.
Your Three Best Options for Magnetic Boards
Once you’ve assessed your door, you can choose the best method for creating your magnetic surface. Each has its pros and cons.
Option 1: Thin Sheet Metal Panels
This involves mounting a thin sheet of steel or galvanized steel to the inside of the door. The panel itself becomes the magnetic surface that you can attach items to with individual magnets, or you can use it to hold items that are already magnetic (like spice tins).
- Pros: Provides a large, uniform surface; looks clean and professional; very durable.
- Cons: Can be the heaviest option; may require cutting with tin snips; requires secure mounting with screws or very strong adhesive.
Option 2: The DIY Route with Magnetic Paint
Magnetic primer or paint contains fine ferrous iron particles that attract magnets. You paint it directly onto the door’s surface.
- Pros: Completely invisible once painted over with your cabinet’s matching color; fully customizable to any shape or size.
- Cons: Offers the weakest magnetic pull; requires multiple (3-5) coats to be effective; labor-intensive. I’ve found this works best for very lightweight items, like holding paper notes with small magnets.
Option 3: Strategic Magnetic Strips or Discs
Instead of a full panel, you can use individual magnetic knife strips or powerful, adhesive-backed disc magnets. This is a targeted approach.
- Pros: Very lightweight; cost-effective; easy to install; places magnetic force exactly where you need it.
- Cons: Less aesthetically uniform; items must be placed on the specific strips or discs to stick.
Comparison at a Glance
| Feature | Sheet Metal Panel | Magnetic Paint | Strips / Discs |
| Overall Weight | Moderate to Heavy | Very Light | Light |
| Magnetic Pull | N/A (Surface) | Weak | High (Targeted) |
| Installation | Moderate | Hard (Time-Consuming) | Easy |
| Cost | Moderate | Moderate | Low to High |
| Best Use Case | Spice tins, a variety of small tools | Paper notes, kids’ magnetic letters | Knives, scissors, specific metal tools |
The Definitive Installation Guide
Proper installation is key to a long-lasting and functional magnetic board. Rushing this process is how you end up with a sagging door or a panel that falls off.
Step 1: Meticulous Measuring and Planning
This is the step everyone wants to skip, but it’s crucial.
- Measure the Inset Panel: Open your cabinet door and measure the flat area inside the raised frame (the stile and rail). This is your maximum workable area.
- Check for Clearance: This is a huge one. Your shelves and any items on them will stop the door from closing if your magnetic board and its contents stick out too far. A simple trick is to tape a piece of cardboard (the same thickness as your planned board + your thickest item) to the door and try to close it. If it hits a shelf, you need to adjust your placement.
- Map Your Items: Before you install anything, lay out the items you want to store on a table. Arrange them how you’d like them on the door. This tells you exactly how much space you need and prevents you from installing a board that’s too big or too small.
Step 2: Prepare the Door Surface
Adhesives and paints fail when the surface is dirty or too slick.
- Clean Thoroughly: Wipe the entire surface with isopropyl alcohol. It removes grease and residue without leaving a film.
- Lightly Scuff (If Needed): If your cabinet has a high-gloss finish, give it a very light sanding with fine-grit sandpaper (220-grit is good). This creates a microscopic texture that helps adhesives and primers grip much better. Wipe away all dust afterward.
Step 3: Secure Installation
The method depends on your chosen material.
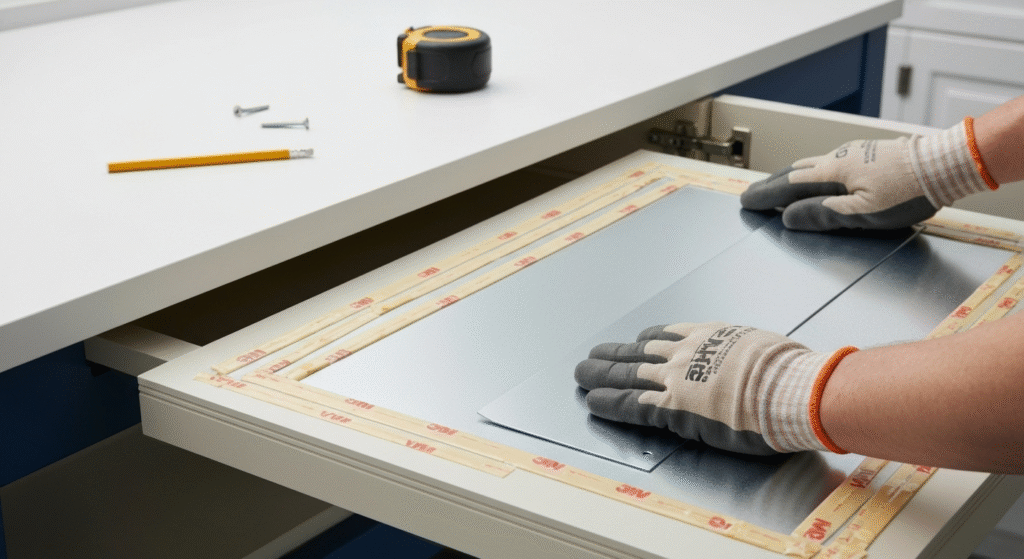
- For Sheet Metal Panels:
- Adhesive: Do not use regular double-sided tape. You need industrial-strength tape like 3M VHB (Very High Bond). Apply it around the entire perimeter of the panel and in an ‘X’ pattern across the middle for full support.
- Screws (Recommended for heavy loads): This is the most secure method. Use short screws that will not go through the front of your door. A foolproof way to do this is to measure the door’s thickness, then choose a screw that is at least 1/4 inch shorter. Drill small pilot holes first to prevent the wood from splitting.
- For Magnetic Paint:
- Patience is key. Apply a thin, even coat of the magnetic primer. Let it dry completely according to the manufacturer’s instructions.
- Apply another coat. Repeat for at least 3-4 coats. After the third coat, test the pull with a magnet. If it feels weak, add another.
- Once fully cured, you can paint over it with your cabinet’s matching color.
- For Magnetic Strips/Discs:
- Most of these come with an adhesive backing. After cleaning and scuffing the surface, press the strip firmly in place and hold for 30-60 seconds.
- Let the adhesive cure for at least 24 hours before you hang anything on it. This allows the bond to reach its maximum strength.
Common Mistakes I’ve Seen (And How to Avoid Them)
Learning from others’ mistakes is much cheaper and less frustrating than making them yourself.
- Forgetting Shelf Clearance: This is the most common error. The result is a door that won’t close. Fix: Always do the cardboard clearance test before you permanently attach anything.
- Using Weak Adhesives: Standard craft tape will fail, usually in the middle of the night with a loud crash. Fix: Invest in the right adhesive (3M VHB, construction adhesive like Liquid Nails) or use short screws for a permanent hold.
- Overloading a Particleboard Door: This leads to sagging doors and stripped hinges. Fix: If you have particleboard doors, stick to the lightest options, like magnetic strips or discs, and only store lightweight items.
- Scratching Your Knives: Powerful, uncoated magnets can scratch the finish on your tools or knives. Fix: Choose magnetic bars that have a wood, silicone, or plastic coating. Alternatively, you can apply a thin layer of adhesive-backed felt or vinyl to your metal sheet.
Frequently Asked Questions (FAQs)
1. Will strong magnets damage my kitchen knives?
No, a quality magnetic knife bar will not damage your knives. The magnetic field is not strong enough to affect the steel’s molecular structure or “temper.” The only risk is physical scratching, which can be avoided by choosing a coated bar or gently placing and removing the knives.
2. Can I install a magnetic board on a hollow-core door?
It’s not recommended. Hollow-core doors have a very thin wood veneer over a cardboard honeycomb interior. They lack the structural integrity to hold screws well and can be easily damaged by the weight. This project is best suited for solid cabinet doors.
3. How much weight can a standard cabinet door actually handle?
There’s no single answer, as it depends on the door material, its size, and the quality of the hinges. A safe rule of thumb for a standard particleboard or MDF door is to keep the total added weight (board + items) under 2-3 pounds (about 1-1.5 kg). A solid wood door can often handle 5 pounds or more, but you should always test and check for any sagging.
4. Will the magnets affect my phone or credit cards?
Yes, they can. Strong neodymium magnets can interfere with the magnetic strip on credit cards and potentially cause issues with smartphone components if held in very close proximity for an extended period. However, since this storage is inside a cabinet, the risk of accidental contact is extremely low. Just be mindful not to place your wallet or phone directly on the magnetic strip.
Conclusion: Reclaim Your Space
Transforming the back of a cabinet door with a magnetic board is more than just a storage hack; it’s about creating a smarter, more efficient system in your home. It’s a project that delivers a huge organizational payoff for a relatively small amount of effort.
The key to success lies in thoughtful planning. By taking a few extra minutes to assess your cabinet doors, choose the right materials for your needs, and prioritize a secure installation, you can create a durable and incredibly useful storage spot that was hiding in plain sight all along. So take a look at your cabinets, find that perfect door, and get ready to unlock a new world of organization.

Hi, I’m Edom Clark, the creator and writer behind Taanzo. For the past five years, I’ve been exploring and writing about kitchen storage and home organization. My experience comes from both personal experimentation and hands-on observation — testing different storage systems, materials, and layouts to find what truly works in everyday homes. Over time, I’ve come to appreciate how small adjustments in storage can transform the way we cook, clean, and even enjoy time in the kitchen. Through Taanzo, I aim to share that knowledge in a way that’s honest, approachable, and genuinely useful.

