
Is your pantry a source of calm or chaos? For many of us, it’s a constant battle. In the summer, you’re digging past cans of pumpkin purée to find the barbecue sauce. In the winter, bags of grilling charcoal are blocking the heavy-duty flour you need for holiday baking. A pantry organized for one season often feels completely wrong for the next. The problem isn’t a lack of organization; it’s a static system in a dynamic, seasonal kitchen. But what if your pantry could adapt with you, effortlessly shifting to support your cooking habits throughout the year?
For years, I’ve worked with homeowners to design kitchen storage that truly functions for their lives. My name is Edom Clark, and my passion is exploring how thoughtful organization can transform our daily routines. After spending over five years helping people untangle their kitchen chaos, I’ve seen firsthand how a well-planned pantry does more than just store food—it saves time, reduces waste, and makes cooking a joy. I focus on practical, real-world systems, and one of the most effective strategies I’ve implemented is the convertible pantry, a method that aligns your storage with the seasons.
Why a Seasonal Pantry is a Game-Changer

Before we dive into the “how,” let’s talk about the “why.” Shifting to a seasonal pantry system isn’t just about being tidy; it’s a strategic move that brings tangible benefits to your kitchen and your budget. It transforms your pantry from a passive storage space into an active tool for better cooking and living.
Here’s the thing, a disorganized pantry costs you more than just frustration. It can lead to:
- Food Waste: Ingredients get lost in the back, expire, and are thrown away.
- Duplicate Purchases: You buy a new jar of cinnamon, only to find three others hiding behind the summer drink mixes.
- Meal Planning Stress: It’s hard to plan meals when you don’t have a clear picture of what you actually own.
I remember once rummaging for a specific spice blend for a summer marinade. I had to pull out three large containers of holiday-themed sprinkles and a bag of mulling spices just to find it. That was the moment I realized my pantry was fighting me. A convertible pantry system solves these problems by keeping the ingredients you need right now at your fingertips while safely storing the rest for later.
The Core Principles of a Convertible Pantry
Creating a pantry that shifts with the seasons is built on three simple but powerful principles. Understanding these ideas is the first step to building a system that works for you, not against you. Let’s break them down.
Principle 1: Defining Your Zones
The foundation of any organized space is zoning. In a convertible pantry, we have two main types of zones: Core Zones and Seasonal Zones.
- Core Zones: These are for your year-round staples. Things like olive oil, salt, pasta, rice, and your favorite snacks belong here. These items should live in the most accessible part of your pantry—what I call the “prime real estate”—at eye level and within easy reach.
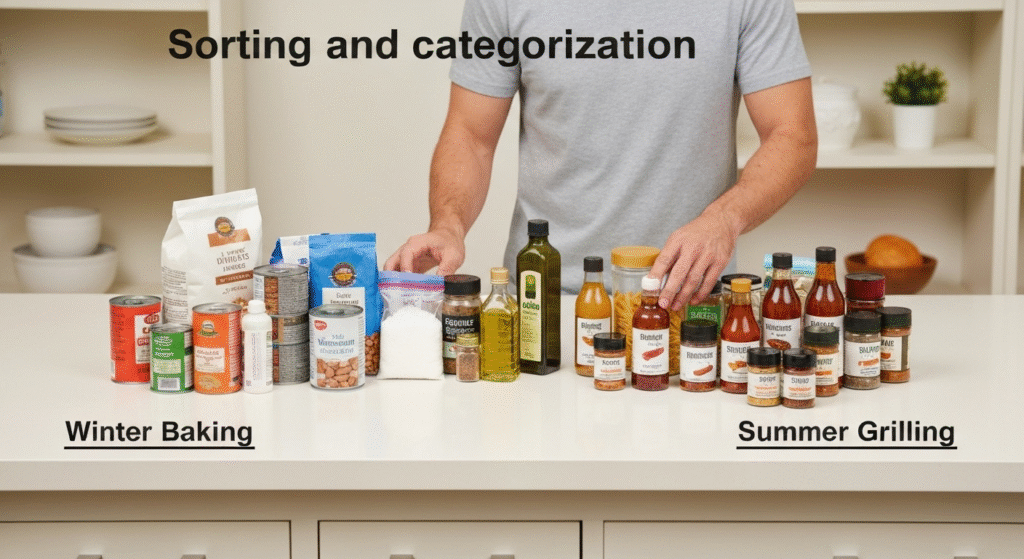
- Seasonal Zones: This is where the magic happens. You’ll create designated areas for ingredients that see heavy use only during certain parts of the year. Think of a “Winter Baking & Soups” zone (heavy flours, canned tomatoes, dried beans, molasses) and a “Summer Grilling & Preserving” zone (marinades, pickling spices, BBQ rubs, light vinegars).
Principle 2: The Art of Rotation
The “convertible” part of the system is all about rotation. Twice a year, you’ll perform a pantry swap. Your current season’s ingredients move into the prime real estate, becoming your “Active Zone.” The off-season ingredients are neatly packed and moved to a less accessible area, becoming the “Dormant Zone.” This could be a higher shelf, the back of a deep cabinet, or a designated bin on the floor. The key is that they are out of your way but not forgotten.
Principle 3: Choosing the Right Tools
You don’t need a complete pantry renovation to make this work. The right tools are simply items that make your zones flexible and your rotation process smooth. This includes things like adjustable shelves that can change height to accommodate different items, clear bins that let you see what’s inside, and a smart labeling system that makes the biannual swap quick and painless.
Essential Tools for Building Your Convertible Zones

With the principles in mind, let’s get into the practical tools that bring your convertible pantry to life. Investing in the right organizational gear makes the difference between a system that lasts and one that falls apart in a few weeks.
Adjustable Shelving: Your Pantry’s Foundation
If you have the option, adjustable shelving is the single best feature for a convertible pantry. Winter items, like bulk bags of flour and large cans of crushed tomatoes, often require more vertical space than summer items like smaller bottles of marinades and spices. Being able to change the height of your shelves prevents wasted space and keeps things from getting crammed.
Comparison of Shelving Materials
| Feature | Wire Shelving | Solid Wood/MDF Shelving |
| Pros | – Excellent air circulation – Easy to clean – Budget-friendly | – Stable surface (no tipping) – Supports heavy weight – Aesthetically pleasing |
| Cons | – Small items can tip or fall through – Can sag under heavy weight | – Can be more expensive – Less air circulation – Can be harder to adjust |
| Best For | Ventilated storage for produce like onions and potatoes; lighter canned goods. | Heavy items like bulk bags, large jars, and small appliances. |
Dividers and Bins: The Key to Separation
Dividers and bins are what truly define your zones. They create visual boundaries, making it easy to see where one category ends and another begins. This prevents “pantry creep,” where your winter spices slowly invade your summer snack section.
Just last month, I was helping a client whose small but deep pantry was a constant source of frustration. Her off-season baking supplies were always in the way. We implemented a system of long, clear, slide-out bins. We labeled one “Winter Baking” and another “Hearty Soups.” Now, her dormant items are neatly contained and can be easily accessed with a simple pull, without her having to unload half the shelf first.
Comparison of Organizers for Seasonal Zones
| Organizer Type | Pros | Cons | Best Seasonal Use Case |
| Clear Acrylic Bins | – Easy to see contents – Stackable – Modern look | – Can be brittle/crack – Can be pricey | Storing summer items like individual drink mixes and marinade packets. |
| Wire Baskets | – Great airflow – Durable – Easy to carry | – Small items can fall out – Can scratch shelves | Holding winter root vegetables or bulky bags of pasta and beans. |
| Tension Rod Dividers | – Highly adjustable – No installation needed – Minimalist look | – May slip under pressure – Not for heavy items | Separating bags of chips and crackers in the summer from bags of flour in the winter. |
| Color-Coded Totes | – Easy identification – Great for deep storage – Protects from light | – Opaque (can’t see inside) – Can be bulky | Storing dormant season items on high shelves or in a basement/garage. |
The Power of a Smart Labeling System
Your labeling system is the final piece of the puzzle. It’s your instruction manual for the pantry. A good system makes the seasonal swap take minutes instead of hours.
- Color-Coding: This is my favorite trick. Use one color label for winter items (e.g., blue) and another for summer items (e.g., yellow). At a glance, you can see what belongs in the active zone.
- Erasable Labels: Chalkboard or white-board labels are fantastic. You can easily update the contents of a bin without having to peel off a sticky label.
- Label Maker: For a clean, uniform look, a simple label maker is a great investment. Be sure to label the shelf as well as the bin, so you always know where things are supposed to go back.
Step-by-Step Guide to Your First Seasonal Pantry Rotation
Ready to take action? Here is a simple, five-step guide to transition from a static pantry to a dynamic, convertible one. Set aside a weekend afternoon for your first rotation; future swaps will be much faster.
Step 1: The Great Pantry Audit
Start with a clean slate. Take everything out of your pantry. Yes, everything.
- Wipe It Down: Give all your shelves a good cleaning.
- Sort and Categorize: As you take items out, group them on your counter or table. Create piles for: Year-Round, Spring/Summer, and Autumn/Winter.
- Check Dates: This is the perfect time to find and discard anything that has expired. Be ruthless!
Step 2: Designate Your Seasonal Zones
Look at your empty pantry and map out your new system.
- Prime Real Estate (Active Zone): Identify the shelves between your waist and your eyes. This is where the current season’s items will live.
- Secondary Storage (Dormant Zone): Designate the top shelves, floor space, or the back of deep shelves for your off-season items.
Step 3: Implement Your Tools
Now it’s time to set up your organizational gear.
- Adjust your shelves to the heights you need.
- Place your empty bins, baskets, and dividers on the shelves according to your map.
- Apply your labels to both the containers and the edge of the shelf itself.
Step 4: The Swap – Moving Items into Place
This is the satisfying part. Begin placing your food back into the pantry according to the system you’ve created.
- Put the current season’s items into their designated “Active Zone” in the prime real estate.
- Neatly pack your off-season items into their “Dormant Zone” containers. Make sure they are stored securely and out of the way.
Step 5: Create an Inventory List
To avoid buying duplicates, create a simple inventory of what’s in your Dormant Zone. A small whiteboard inside the pantry door or a note on your phone works perfectly. A quick glance at the list before you go shopping can save you money and prevent clutter.
Maintaining Your Convertible Pantry System
A great pantry system is not a one-and-done project. It requires small, consistent efforts to keep it running smoothly.
The Mid-Season Tidy-Up
About halfway through a season, take 15 minutes to straighten things up. Put items back in their designated zones, wipe up any spills, and make sure everything is in its place. This quick reset prevents clutter from building up and makes the next big rotation much easier.
Planning for the Next Rotation
Mark your calendar for your next big swap. Good times are typically early April (swapping to Spring/Summer) and late September (swapping to Autumn/Winter). As you use your system, take note of what works and what doesn’t. Maybe you need an extra bin for summer snacks or you realize a certain spice is actually used year-round. Don’t be afraid to adjust your zones to better fit your real-life cooking habits.
Frequently Asked Questions (FAQs)
What if I have a very small pantry?
This system is even more crucial for small spaces! Use vertical space with stackable bins and under-shelf baskets for your dormant zone. A small set of shelves in a nearby closet or garage can also serve as your off-season storage area.
How do I handle items that are used year-round?
Year-round items form your “Core Zone.” Things like oils, spices, flour, sugar, coffee, and basic canned goods should always be stored in the most accessible part of your pantry. They do not get rotated.
Is it worth buying expensive organizers?
Not necessarily. You can start with simple, budget-friendly options like shoeboxes or repurposed containers. The key is the system of rotation, not the price of the bins. Upgrade your tools over time as you figure out what works best for your space and items.
How often should I do a full pantry rotation?
A major rotation should happen twice a year, at the change of the main cooking seasons (spring and fall). This is when you’ll swap your “Active” and “Dormant” zones. A quick 15-minute tidy-up every month or so will keep everything in order between the big swaps.
Your Pantry, Your Rules
Creating a convertible pantry is about taking control of your kitchen and making it work for you. It’s a flexible, living system that adapts to your needs throughout the year, ensuring the ingredients you need are always front and center. By dedicating a little time to set up your zones and perform a simple seasonal swap, you can say goodbye to pantry frustration and hello to a more organized, efficient, and enjoyable cooking experience.

Hi, I’m Edom Clark, the creator and writer behind Taanzo. For the past five years, I’ve been exploring and writing about kitchen storage and home organization. My experience comes from both personal experimentation and hands-on observation — testing different storage systems, materials, and layouts to find what truly works in everyday homes. Over time, I’ve come to appreciate how small adjustments in storage can transform the way we cook, clean, and even enjoy time in the kitchen. Through Taanzo, I aim to share that knowledge in a way that’s honest, approachable, and genuinely useful.
